Creating a Personalized Photoshoot for Calendar: A Guide to Cherished Memories
A personalized photo calendar is more than just a practical tool to keep track of the days; it’s a thoughtful, heartwarming gift that can bring joy and nostalgia to your loved ones. Perfect for the holiday season or special occasions, these calendars can capture moments from the past year or highlight themed photoshoot for calendars that celebrate each month. If you want to create a one-of-a-kind calendar featuring children, you’re in for a rewarding experience. Here’s a comprehensive guide to help you craft a stunning photo calendar filled with creativity, charm, and priceless memories.
Why Choose a Photo Calendar?
Photo calendars hold a unique appeal because they combine functionality with emotional value. They’re a beautiful way to immortalize milestones, everyday moments, or special occasions. Adding personal touches, especially with photographs of children, makes them all the more endearing. Whether it’s for parents, grandparents, or close friends, this keepsake is bound to bring smiles all year long.
The versatility of a photo calendar allows you to design each page to reflect a different theme or sentiment. From cozy winter settings to vibrant summer days, each month can tell its own story. With the right planning and a touch of creativity, your calendar will be as enjoyable to create as it is to gift.

Planning Your Calendar: Themes for Every Month
The key to a captivating photo calendar lies in aligning each month with a specific theme or tradition. Let the seasons and holidays guide your creativity, using props and backdrops that evoke the spirit of the time. Below are some ideas to inspire your monthly themes:
- January: Celebrate winter with props like mittens, scarves, ice skates, or skis. Snowflakes, faux snow, and warm attire set the perfect scene for this chilly month.
- February: Embrace the theme of love with heart-shaped props, red and pink tones, or Valentine’s Day accessories like roses and chocolates.
- March/April: Welcome spring with Easter eggs, blooming flowers, pastel colors, or gardening tools. These months are ideal for capturing the freshness and renewal of the season.
- May: Focus on floral motifs with blossoming branches, flower crowns, or nature-inspired props. Celebrate Mother’s Day or the arrival of warmer days.
- June: Showcase early summer fun with strawberries, sunglasses, picnic settings, or sunny backdrops. This month invites lighthearted and playful imagery.
- July/August: Highlight summer adventures with swimsuits, beach balls, sun hats, and water-themed props. Capture the joy of sunny days and outdoor activities.
- September: Shift the focus to back-to-school themes with books, notebooks, glasses, or classroom settings. Celebrate learning and the transition into autumn.
- October: Celebrate fall and Halloween with pumpkins, colorful leaves, costumes, or spooky decorations. This is a great time for creative and playful shots.
- November: Use cozy props like candles, warm sweaters, or Movember-themed mustaches. Highlight the transition into the holiday season with earthy tones and autumn vibes.
- December: Finish the year with festive cheer, incorporating Christmas lights, ornaments, gifts, and winter wonderland settings. Add New Year’s Eve props like confetti or party hats for a celebratory touch.
Setting the Scene: Studio vs. Home Photo Shoots
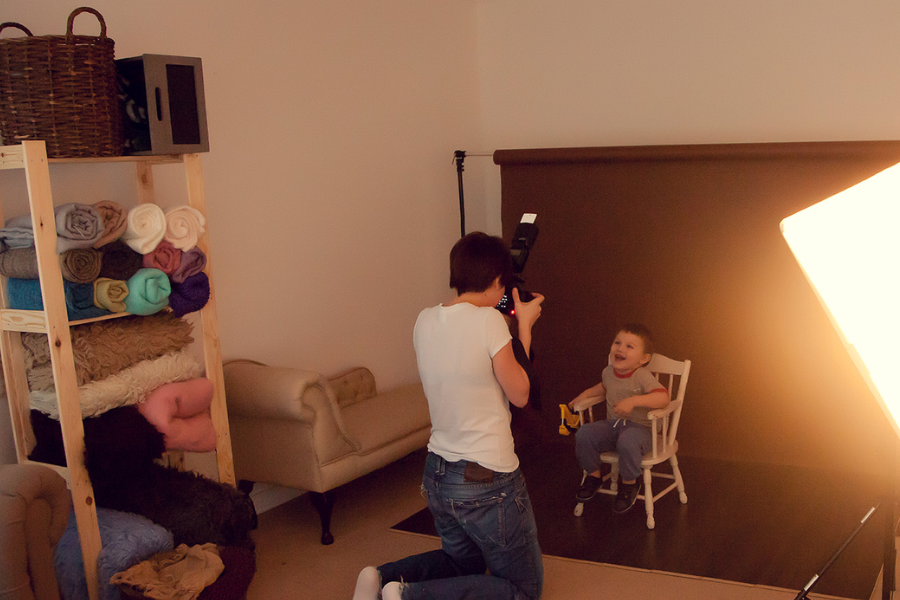
Choosing the right location for your photoshoot for calendar plays a significant role in the outcome of your calendar. Both studio and home settings have their advantages, so consider what works best for you and the children involved.

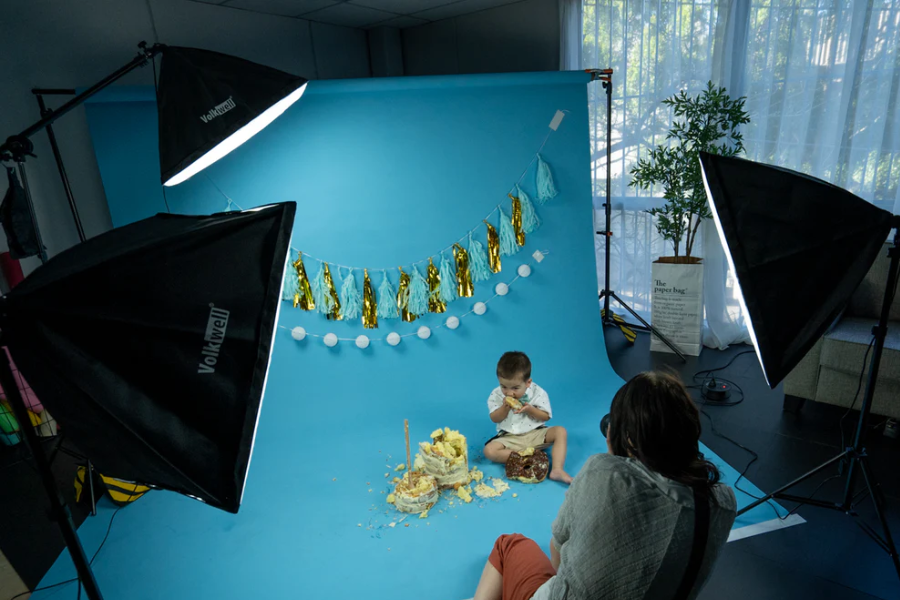
Studio Advantages:
- A professional studio provides controlled lighting and versatile backdrops, making it easier to achieve polished results.
- You’ll have access to high-quality equipment, such as adjustable lighting and props.
- Studios are ideal for consistent and professional-looking images, particularly if you’re aiming for a cohesive aesthetic.
Home Comforts:
- Children often feel more relaxed in familiar surroundings, which can lead to more natural and joyful expressions.
- Home shoots allow for personalized settings, such as favorite toys or household items, that can add a unique touch to your photos.
- With the right approach, even simple backdrops like plain walls, couches, or bedsheets can be transformed into beautiful settings.
Choosing the Right Equipment for Child Photography
When capturing the innocence and joy of children, having the right equipment can make a significant difference in the quality of your photos. Whether you are working in a professional studio or a cozy home setting, the tools you use will greatly influence the final results. Below is a detailed guide to help you make the best choices for your equipment setup.

Cameras and Lenses for Versatile Photography
The choice of camera and lens is crucial in achieving high-quality shots. Here’s what to consider for different settings:
1. Studio Photography
For studio photography, where you have control over the environment, versatile zoom lenses are highly recommended. Lenses like 24-70mm or 70-200mm are excellent options because they offer flexibility. These lenses can handle everything from intimate close-ups to expansive wide-angle shots, allowing you to capture a variety of poses and moments without needing to frequently change lenses.
2. Home Photography
When shooting at home, the focus shifts to creating warmth and intimacy in your photos. Portrait lenses, such as 50mm or 85mm primes, are fantastic for this setting. These lenses often feature wide apertures that produce stunning natural bokeh, making the background beautifully blurred while keeping the child in sharp focus. This effect can add a soft, dreamy quality to your images and reduce the need for heavy post-processing.
Lighting Tips for Stunning Results
Lighting is one of the most important aspects of photography. While professional lighting equipment can produce remarkable results, natural light can be just as effective with the right techniques.
1. Using Natural Light
If you don’t have access to professional lighting equipment, natural light is your best ally. Position your subjects near a large window to make the most of diffused daylight. This type of light is soft and flattering, especially for young children, whose delicate features can be overwhelmed by harsh lighting.
2. Modifying Natural Light
To soften harsh sunlight streaming through a window, you can use a white cloth or sheer curtain. This diffuses the light, eliminating strong shadows and preventing overexposure. Reflectors are also valuable tools for balancing shadows and ensuring even lighting across the child’s face and body. If you’re serious about photography, investing in a high-quality reflector can dramatically enhance your images by directing light exactly where you need it.
3. Enhancing with Artificial Lighting
For those looking to take their photography to the next level, consider investing in a softbox or ring light. These tools provide consistent, even lighting, mimicking the softness of natural light. They are particularly helpful for indoor shoots on cloudy days or in dimly lit spaces.
Additional Equipment and Accessories
Besides cameras, lenses, and lighting, there are other tools that can elevate your photography:
- Tripods: Essential for stability, especially in low-light situations or when capturing candid moments.
- Memory Cards: Use high-capacity, fast-speed memory cards to ensure you don’t miss any important moments.
- Editing Software: While great photography starts with the camera, post-production tools like Adobe Lightroom or Photoshop can enhance your images further.
Working with Children: Tips for Success
Photographing children comes with its own set of challenges, but it’s also incredibly rewarding. Their genuine expressions and unpredictable reactions can result in truly magical moments. Here are some tips to ensure a smooth and enjoyable experience:
1. Plan Ahead:
- Prepare your props, wardrobe, and settings in advance to minimize delays during the shoot.
- Communicate with the parents about the themes and any items they should bring.
2. Keep It Fun:
- Turn wardrobe changes into a game. Little girls might enjoy pretending it’s a fashion show, while boys can imagine they’re superheroes or adventurers.
- Incorporate toys, books, or small treats to keep the kids engaged and entertained.
3. Take Breaks:
- Allow time for snacks, drinks, and rest. Children’s energy levels can fluctuate, so breaks are crucial for maintaining their cooperation.
- Offer rewards like cookies or stickers to motivate younger kids.
4. Adapt to Their Mood:
- Be flexible and patient. If a child is shy, try easing them into the session with familiar props or by involving their parents.
- For more active kids, incorporate movement into the shoot, such as jumping, dancing, or playing.
5. Embrace the Unexpected:
- Children’s spontaneity often leads to the most endearing photos. Be ready to capture candid moments, even if they weren’t part of your original plan.
Practical Tips for Seamless Shoots
- Keep Sessions Short: Limit the shoot to 2-3 hours, as children’s attention spans are shorter than adults’. Dedicate time to wardrobe changes, setup adjustments, and breaks.
- Use Simple Backdrops: If you’re at home, a plain wall, neutral-colored couch, or simple bedsheet can work wonders. Decorate with seasonal props to match your theme.
- Play with Angles and Lighting: Experiment with different perspectives and light sources to add variety to your shots. For instance, backlighting can create a magical glow, while side lighting adds depth and texture.
- Focus on Details: Capture close-ups of small hands holding flowers, tiny feet in festive socks, or adorable expressions. These details add personality to your calendar.
Bringing the Calendar to Life
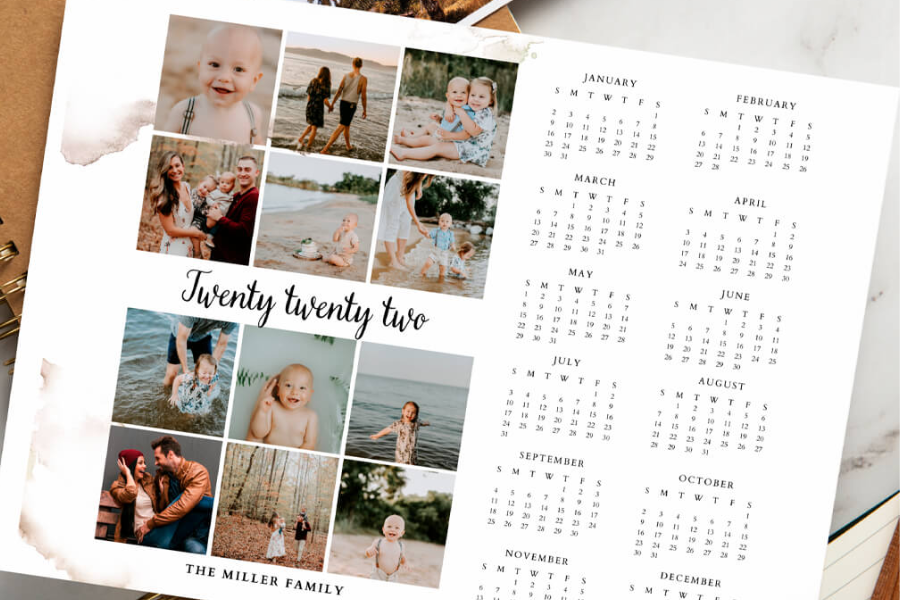
Once you’ve completed your photoshoot for calendar, it’s time to design your calendar. Photo editing software like Zoner Photo Studio X can help you customize layouts, enhance colors, and add decorative elements. Include captions, quotes, or messages that complement the images and make each page feel special.
Consider using a mix of full-page images and collages to add variety. You can also incorporate important dates or family milestones into the calendar for a personal touch. Ensure the final product is printed on high-quality paper to showcase your hard work.
Facts About Child Photography Equipment
- Versatile Zoom Lenses: Lenses like 24-70mm and 70-200mm are ideal for studio photography, offering flexibility for a range of shots.
- Portrait Lenses for Home Use: Prime lenses such as 50mm or 85mm create stunning bokeh effects that enhance portraits.
- Natural Light: Positioning children near windows and using diffused daylight can result in soft, flattering images.
- Reflectors and Diffusers: Reflectors help balance shadows, while white cloths or sheer curtains can diffuse harsh sunlight.
- Artificial Lighting Options: Tools like softboxes and ring lights mimic natural light for consistent indoor photography.
- Stability Tools: Tripods ensure steadiness, especially for low-light or long-exposure shots.
- Post-Processing: Editing software such as Adobe Lightroom or Photoshop enhances final images with color correction and retouching.
FAQs About Choosing Child Photography Equipment
Q: What type of camera is best for child photography?
A: A DSLR or mirrorless camera with interchangeable lenses offers the most flexibility and quality. Look for models with fast autofocus to capture fleeting moments.
Q: Do I need professional lenses for home photography?
A: Not necessarily. A prime lens like a 50mm f/1.8 is affordable and perfect for home photography, offering excellent quality without breaking the bank.
Q: Can I rely solely on natural light?
A: Yes, natural light can produce beautiful results. Position your subject near a window and use a reflector or diffuser to manage shadows and highlights.
Q: Are reflectors expensive?
A: Reflectors are relatively inexpensive, starting as low as $20, and are a worthwhile investment to improve lighting.
Q: Do I need a tripod for photographing children?
A: A tripod is useful for stability but not always essential, especially if you’re capturing active children. However, for posed shots or low-light scenarios, it’s highly recommended.
Conclusion
Choosing the right equipment for child photography requires balancing your needs, budget, and setting. For studio shoots, versatile zoom lenses and professional lighting gear provide flexibility and control. At home, simple yet effective tools like portrait lenses and natural light can create warm and intimate images. By incorporating accessories like reflectors, tripods, and editing software, you can elevate your photography further. Whether you’re a seasoned professional or an enthusiastic beginner, understanding and utilizing these tools and techniques will help you capture timeless moments with stunning clarity and beauty.
Stay Connected: Discover Thrill


